If you've ever been to artist alley you may have seen a few artists selling charms made of shrink plastic and thought to yourself, oh look its a "poor man's" acrylic charm. Honestly shrink plastic does not get enough credit. It is so extremely versatile. Unfortunately because some artists don't know how best to craft and protect the shrink plastic items they make it has gained a bad reputation as a flimsy warped material.
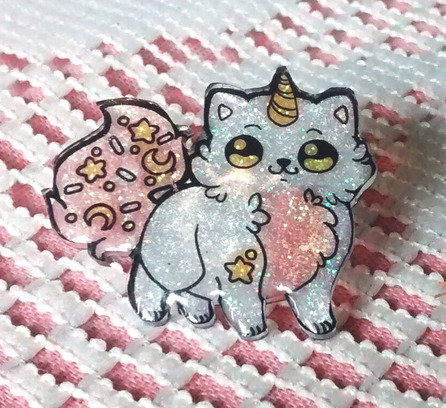
I am here to tell you that shrink plastic can be beautiful!
Fun Fact:
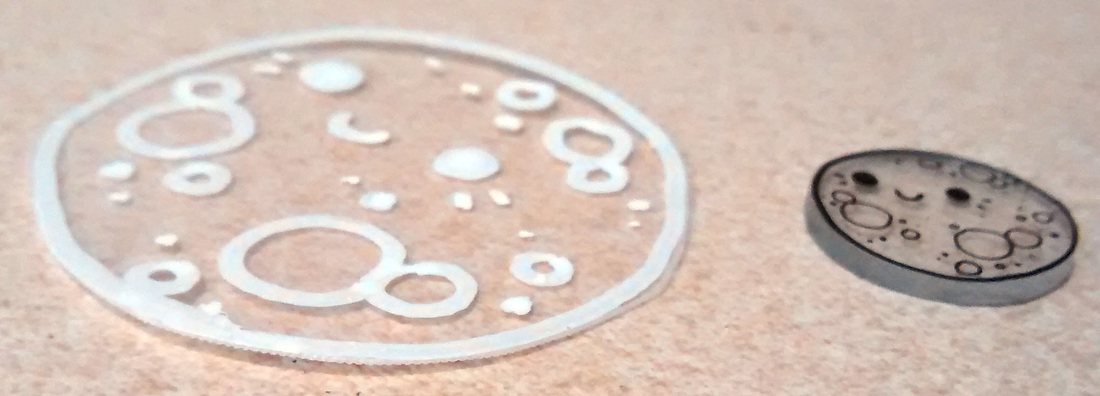
Shrink plastic shrinks to about 50% its initial size and becomes about 5x thicker.
Shrink plastic shrinks to about 50% its initial size and becomes about 5x thicker.
Different Types of Shrink Plastic
There are many different types and brands of shrink plastic. They may vary in quality, and they definitely vary in price.
1. Printable Shrink Plastic: This is a frosted plastic with a coating that allows you to quickly print out your designs. Frosted is a pretty way of saying that one side has been sanded down so that the ink can adhere to the plastic. This is what causes the print side to appear bumpy after it has shrunk. This material also appears to be thinner than the non-printable plastic. Probably so it can be fed through the printer without breaking it.
2. Frosted Shrink Plastic: This plastic is not able to go through your printer. It has been sanded so that you can apply colos with colored pencils, chalk pastels and other tools that need a toothy surface to grip and hold the color. You can also create your own by sanding one side of smooth shrink plastic.
3. Shrink Plastic: Regular shrink plastic that has not been sanded both sides are smooth.
4. Recycled #6 Plastic: You can recycle some (not all) plastic containers. If you see it has a #6 inside of the recycle symbol. Great for the eco-conscious.
Shrink plastic also comes in different colors, even though you most commonly see them in white or clear.
What can you make with Shrink Plastic anyway?
Charms
Bracelets
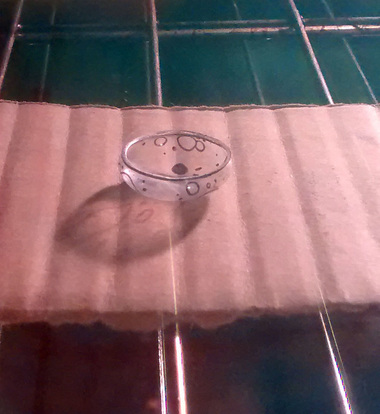
Rings
Earings
Pins
Pendants
Miniature sculptures
Beads
Playing pieces
Probably a ton of other items that you have yet to imagine.
Bracelets
Rings
Earings
Pins
Pendants
Miniature sculptures
Beads
Playing pieces
Probably a ton of other items that you have yet to imagine.
The Follies of Shrink Plastic (or why you should properly prepare your plastic)
I bought a shrink plastic charm a few years ago that did not give me any confidence in the material. It was the kind you could run through an inkjet printer. It had the cutest art on it, even though it was a little warped out of shape. Unfortunately some water got on the charm and caused the colors to bleed. I was very sad. Another common problem for shrink plastic is that it can easily snap if you use too thin a material, or make thin places that will be weak. Even thick acrylic charms will snap if you make a section too thin. The good new is that there are ways to make the finished product stronger that also make it look beautiful and polished.
Shrink plastic does not have to be flimsy!

Ways to Transfer your art on Shrink Plastic
Regardless of which method you choose you need to protect your art so it does not get ruined by water, rubbed off or scratched off.
Pre-baking Application
1. Inkjet Printer: You can print your designs directly onto printable shrink plastic. There are many benefits to this method. This is the quickest method. The art looks complete an exactly as intended. However this is often the thinnest plastic, and is more prone to warping.
2. Permanent Markers: You can use permanent markers to draw directly on smooth plastic. The ink will not smear, although it can be scratched off or if you make a mistake you can rub it off. Black permanent marker appears opaque. Colored permanent marker will remain see through which makes for a cool stained glass window effect. Be aware that when the plastic shrinks the colors will darken and appear more saturated, with is not a good thing if you want to pull off some pretty pastels.
3. Colored Pencils: These are great for creating softer colors, shading, and color gradients. The colors also will appear darker, but they do not change as drastically as permanent marker. This works only on frosted shrink plastic. Make sure you color in the plastic completely, or you will still be able to see speckles where the pencil didn't fill in.
4. Chalk Pastels: Blending colors can make soft transitions. This is not a good medium for details, but if you apply it to clear plastic that has been sanded you can preserve the transparency.
Post-baking Application
This is a bit trickier to do since you will be working with the plastic after it has shrunk to tiny size.
1. Paint: You can paint your plastic after it has shrunk. Please do not put paint in the oven. You must only do this after baking.
2. Colored Resin: You can apply resin similar to painting. You can add dye, powdered pigments like chalk pastel or mica powder, and glitter to color your resin. Powdered pigments will reduce the transparency of the resin.
Combine Methods
Most of these can be used together to create a stunning effect. If you are looking for sharp lines you could use a fine point permanent marker. Softer but well defined lines, use colored pencil. Then color it in with one of the other methods.
Tips for making it awesome!
Here are some tips to make your finished piece look polished and protected.
1. Careful Cutting: This may seem like common sense, but how you cut the plastic can make it look professional, or like a hack job. You can either cut up right against your lineart, or you can leave an even border all the way around your design. Uneven sloppy cutting just looks bad. Try using an exact knife on those hard to reach places. Or plan out your design so that the cutting will be simple. You do not need to cut out spaces in the middle of your design unless it is a donut hole or something large. Please be aware of weak points you may create in your design.
2. Sanding: After you have completed cutting you may want to trim or sand any sharp corners or jagged lines.
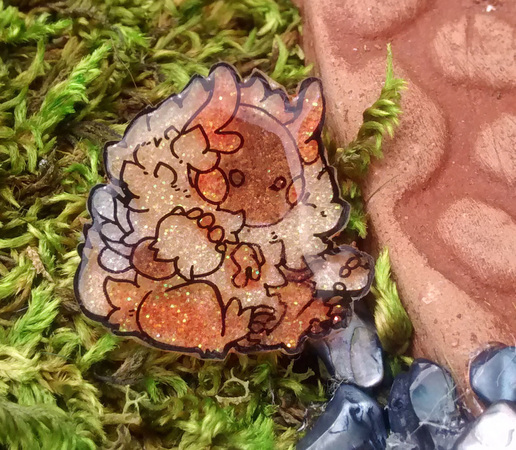
3. Doming: Using a clear resin or another doming medium cover your art. If your artwork is on the backside of the clear plastic you should also dome the front, because it will look beautiful with the front domed. The colors come through much brighter. This does add more cost to your project but it has several added benefits. Not only does it make your art appear more professional and super shiny, it protects your art from water damage, scratching, rubbing off over time. It also makes the piece thicker making it less prone to breaking, and smooths out the surface if your piece is not perfectly flat.
4. Baking Patience: Shrinkage happens pretty quickly, but seems to slow down near the end. Wait patiently for it to flatten out all the way. Do not over bake because it can cause clear plastic to become cloudy, and white plastic to discolor. You also need to be on stand by because longer pieces may try to roll over and stick to itself use chopsticks or something to pull it apart so you don't burn yourself. Don't do too many charms at the same time. They will bake at different speeds depending on size, shape, and oven hot spots.
1. Careful Cutting: This may seem like common sense, but how you cut the plastic can make it look professional, or like a hack job. You can either cut up right against your lineart, or you can leave an even border all the way around your design. Uneven sloppy cutting just looks bad. Try using an exact knife on those hard to reach places. Or plan out your design so that the cutting will be simple. You do not need to cut out spaces in the middle of your design unless it is a donut hole or something large. Please be aware of weak points you may create in your design.
2. Sanding: After you have completed cutting you may want to trim or sand any sharp corners or jagged lines.
3. Doming: Using a clear resin or another doming medium cover your art. If your artwork is on the backside of the clear plastic you should also dome the front, because it will look beautiful with the front domed. The colors come through much brighter. This does add more cost to your project but it has several added benefits. Not only does it make your art appear more professional and super shiny, it protects your art from water damage, scratching, rubbing off over time. It also makes the piece thicker making it less prone to breaking, and smooths out the surface if your piece is not perfectly flat.
4. Baking Patience: Shrinkage happens pretty quickly, but seems to slow down near the end. Wait patiently for it to flatten out all the way. Do not over bake because it can cause clear plastic to become cloudy, and white plastic to discolor. You also need to be on stand by because longer pieces may try to roll over and stick to itself use chopsticks or something to pull it apart so you don't burn yourself. Don't do too many charms at the same time. They will bake at different speeds depending on size, shape, and oven hot spots.
Tutorials I recommend
Shrink Plastic Fish with Glitter Resin by Polymomotea
Shrink Plastic With Chalk Pastels by AtelierLorien
Mini Pastel Gems by Carmen Garcia
Sanrio Stained Glass Window by Polymomotea
Shrink Plastic Rings by Minicuteclub
Shrink Plastic Cat Earrings by Minicuteclub
Painted Shrink Plastic Fruit by Mizuki Ito
Shrink Plastic Bunny by 黒 neco
Plastic Cuff Bracelet by iamKayElle
How to Make Shrink Charms with Recycled Plastic by Draw so Cute
3D Faux Glass Flowers by theminiscrapper michele
Credits
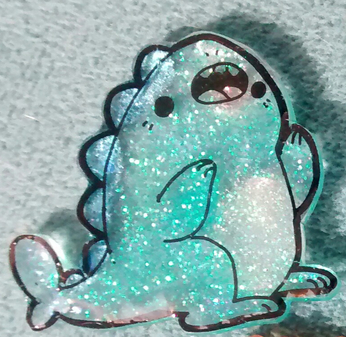
Thank you Polymomotea! I only really got into shrink plastic after watching Polymomotea's amazing tutorial on making Shrink Plastic Fish colored with glitter and resin. As you can see from the photos above I use the technique he taught in his tutorial for my own plastic creations.
All of the photos in this article were taken by me of my own creations. The designs on each of the pins above were created by me with the exception of Honey Hart the bee bird. While his character design is my own, the lovely lineart on this piece is credited to a deviantartist named KingCorvidae.
All of the photos in this article were taken by me of my own creations. The designs on each of the pins above were created by me with the exception of Honey Hart the bee bird. While his character design is my own, the lovely lineart on this piece is credited to a deviantartist named KingCorvidae.
Materials I Use
Here is a linked list to materials I have used in the photos above and where I bought them.
Grafix KSF50-C 8-1/2-Inch by 11-Inch Shrink Film, Clear, 50-Pack
Martha Stewart Crafts Iridescent Glitter, 12-Pack
Martha Stewart Crafts Essential Colors Glitter Set, 24-Pack
Jacquard Pearl EX Set (Series 3)
Mungyo Non Toxic Square Chalk, Soft Pastel, 64 Pack, Assorted Colors
PADICO UV Resin Hard Type
Salon Edge 36W Nail UV Lamp Acrylic Gel Curing Light TIMER 36 WATT Drying Dryer
I hope you found this article useful. If you have a question on this topic please comment below. If you would like to contribute your knowledge on this topic, please fill out the form in the Contact page.
Did you like this article? Please Share, Comment and Subscribe.
There is no better way to say Thank you!


 RSS Feed
